Wednesday, July 29, 2009

Homemade Iced Coffee


Who needs to spendbucks at Starbucks when you can savebucks at home? This is seriously some yummy iced coffee that will have you never paying $5 for a cup again!

The taste of the finished product surprised me. I thought it would be pretty good, but didn't expect it to be something that I would start to crave. Especially considering the level of difficulty in making it.

1. Put 2/3 cup of ground coffee in a 1 quart mason jar (or any 1 quart jar with a lid).
2. Fill the jar with cold water.
3. Let it sit for 12 hours at room temperature.


4. Pour the mixture through a filter so that you are left with only liquid; discard the grounds.


That's it! What you are left with is a verrrrrry strong coffee concentrate that you can keep covered in your refrigerator for 2 weeks. Mine lasts about 2 days. :)

To make an iced coffee with this mixture, pour equal parts coffee concentrate and milk into a glass of ice. I add a dash of vanilla extract and sweeten it with a few spoonfuls of simple syrup. Using sugar to sweeten it probably wouldn't work since the sugar wouldn't dissolve easily in the cold drink, so using a simple syrup solves that problem.

To make simple syrup, combine 1 cup sugar with 1 cup of water in a small saucepan. Heat, while stirring, to a boil. Reduce heat to medium and boil for 2 minutes. Allow to cool. I store this in a covered container in my fridge with the coffee concentrate.

You can make your iced coffee frothy by shaking it in a cocktail mixer and then pouring over ice.

Enjoy!

Monday, July 27, 2009

July Daring Bakers-- Milan Cookies


The July Daring Bakers' challenge was hosted by Nicole at Sweet Tooth. She chose Chocolate Covered Marshmallow Cookies and Milan Cookies from pastry chef Gale Gand of the Food Network.

Okay, so you are probably wondering where my Chocolate Covered Marshmallow Cookies are, aren't you? Well... we only had to make one or the other for the challenge and I had every intention on making both, however I've been taking some online classes for school this summer that are waaaaaaaaaaaay accelerated ( a 17 week courses in 4 weeks and a 17 week course in 7 weeks? Ouch!) and sadly my baking, crafting and blogging have all suffered because of it.

So, I only got the chance to do the Milano cookies. If you are going to do only one of the two, that is the one to do! They were so tasty! I love the Pepperidge Farms Milano cookies and this recipe (minus the citrus junk in there...ewwww) tasted pretty close to them. The only difference was that the ones I made were chewy rather than crunchy, but I loved them chewy!

I worked through this recipe without a single problem- it's very simple, just putzy! I also got more than 3 dozen cookies but I'm not sure exactly how many because the cookies were soooo good to eat even before assembling them, that I'm sure I ate a good 12-15 of the cookies plain! They reminded me of the Tuiles that we made back in January.

Prep Time: 20 min
Cook Time: 1 hr 0 min
Serves: about 3 dozen cookies


• 12 tablespoons unsalted butter, softened
• 2 1/2 cups powdered sugar
• 7/8 cup egg whites (from about 6 eggs)
• 2 tablespoons vanilla extract
• 2 tablespoons lemon extract
• 1 1/2 cups all purpose flour
• Cookie filling, recipe follows

Cookie filling:
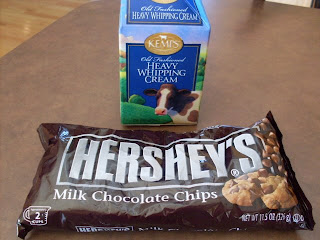
• 1/2 cup heavy cream
• 8 ounces semisweet chocolate, chopped
• 1 orange, zested

I skipped the citrus in both the batter and the filling. I don't think the Pepperidge Farm Milano's have any citrus to them and that just sounds gross to me anyway! So I went with the full chocolate flavor. Why ruin something so beautiful with citrus?


1. In a mixer with paddle attachment cream the butter and the sugar.
2. Add the egg whites gradually and then mix in the vanilla and lemon extracts.
3. Add the flour and mix until just well mixed.

I guess maybe I ate even more than 12-15 cookies if you count the spoonfuls of cookie batter that I ate, too. Oopsy.

4. With a small (1/4-inch) plain tip, pipe 1-inch sections of batter onto a parchment-lined sheet pan, spacing them 2 inches apart as they spread.

I just used my Pampered Chef Cookie Press to pipe the batter. I also used a fancy tip with it instead of a plain round one, but the dough is so thin that it just oozed all together when it baked so it didn't matter anyway.

5. Bake in a preheated 350 degree oven for 10 minutes or until light golden brown around the edges. Let cool on the pan.


6. While waiting for the cookies to cool, in a small saucepan over medium flame, scald cream.
7. Pour hot cream over chocolate in a bowl, whisk to melt chocolate, add zest and blend well.
8. Set aside to cool (the mixture will thicken as it cools).

I know I'm not the only one that ate this by the spoonful either...

9. Spread a thin amount of the filling onto the flat side of a cookie while the filling is still soft and press the flat side of a second cookie on top.

Be sure not to squeeze them together like I did with this one (oh darn... it wasn't presentable so someone had to eat it!).

Much better.


10. Repeat with the remainder of the cookies.

Seriously delicious.

Don't forget to check out the Daring Baker's Blogroll to see other yummy creations for this month!

Wednesday, July 15, 2009

Frozen Strawberry Pie


I thought this would be a refreshing summery dessert while also helping us use up the buckets of strawberries we picked a few weeks ago! It's pretty yummy, but not quite as creamy as I'd like. I may add an entire container of Cool Whip next time. The original recipe called for a Wheat Crust (recipe included below) but I used my mom's crust recipe, which can be found here. I just baked it at 475° for 8-10 minutes and let it cool before filling it with the pie ingredients.

Whole Wheat Pie Crust
1 1/4 cups whole wheat pastry flour
1/8 tsp salt
7 tbs very cold butter
ice water

Mix flour with salt in a medium bowl or food processor. Cut in cold butter with a pastry cutter. Add ice water, 1/2 tbs at a time, until dough forms into a ball. Gather up and pat into a disc. Wrap in plastic and refrigerate dough for at least 30 minutes. When ready to use, roll dough out on a lightly floured surface into a 10-inch circle. Place dough in pie plate and carefully unfold, fitting loosely and then pressing into place. Trim the edges and crimp for a decorative crust. Bake at 475° for 8-10 minutes. Cool to room temperature.


Strawberry Pie Filling

3 6 oz containers strawberry yogurt
6 large strawberries
1 cup cool whip

For filling, blend strawberries and yogurt together in a blender. Stir in Cool Whip and pour filling into cooled pie crust. Chill in freezer for a couple hours. Once frozen, garnish with some sliced strawberries

Thursday, July 9, 2009

Handheld Rhubarb Pie


This is a recipe that my mom made often when I was a child. I just love the egg white topping-- it's the best part of the entire dessert!

Make crust:
2 ½ c. flour
1 c. Crisco
3 Tbsp sugar
½ tsp. salt
2 egg yolks (save egg whites for later in recipe)
2/3 cup milk

Combine flour, Crisco, sugar, and salt for crust with a pastry blender to the consistency of corn meal.

Beat 2 egg yolks and milk.


Add to flour mixture and mix well to form ball of pie crust. Divide into 2 parts. Roll out bottom crust on lightly floured waxed paper to size of jelly roll pan.

Place in jelly roll pan and peel off waxed paper. Let crust come up sides a bit so it will meet the top crust when it is placed over filling.

Filling:
Mix:
1 cup cornflake crumbs
2 tbsp flour
3 Tbsp sugar.

Sprinkle this mixture over bottom crust in jelly roll pan.

Combine:
5 cups cut up rhubarb (1” pieces approximately)
2 cups sugar
½ tsp cinnamon
2 Tbsp flour

Spread the rhubarb mixture over the cornflake crumb mixture in the jelly roll pan. Dot with butter.

Roll out top crust on lightly floured waxed paper. Place on top of rhubarb filling and seal edges all around.


Bake at 400 degrees for 20-30 minutes or until golden brown. Remove from oven to put meringue on.

While the handheld pie is baking, beat 2 egg whites until stiff. Spread on the hot baked crust. Return to oven for 5-10 minutes or until brown.

Friday, July 3, 2009

Summer Beachy Cupcakes


Look how cute these cupcakes are! Perfect for summer treats!

I made them by making basic cupcakes (any recipe will do, or even a (gasp!) box mix!). I then whipped up some basic butter cream frosting:

3 cups powdered sugar
1/3 cup butter (softened)
1 tsp vanilla
1-2 tbsp milk


Use blue food coloring to tint your frosting. I didn't stir mine thoroughly so that there would be some white caps in my "water".

Frost the cupcakes and then sprinkle half of the cupcake with crushed graham crackers to make a sandy beach. You can also use brown sugar, but you will have to eat them right away because the sugar will dissolve into your frosting water.

Decorate your beach with drink umbrellas, sour balls (for beach balls), Teddy Graham Bears and Life Saver candies as floaties.

Use your imagination!